AWS DevOps Real-Time Deployment - Dev → Pre-PROD → Production

𝑪𝒍𝒐𝒖𝒅 𝒂𝒏𝒅 𝑫𝒆𝒗𝑶𝒑𝒔 𝑻𝒆𝒄𝒉 𝑪𝒐𝒎𝒎𝒖𝒏𝒊𝒕𝒚 || 𝑷𝒓𝒐𝑫𝒆𝒗𝑶𝒑𝒔𝑮𝒖𝒚 🤖 https://t.me/prodevopsguy 👋 Hi there! We are ProDevOpsGuy, a passionate DevOps enthusiast Tech Community with a strong belief in the power of automation and collaboration to drive innovation. 🚀 I thrive in bridging the gap between development and operations, creating seamless and efficient software delivery pipelines. My journey in the world of DevOps has allowed me to blend my technical skills with a knack for problem-solving, enabling me to contribute effectively to agile and dynamic environments. 💡 With a keen interest in continuous integration, continuous delivery (CI/CD), containerization, and orchestration, I've had the privilege to explore cutting-edge technologies like Docker, Kubernetes, Jenkins, and Ansible. I find joy in designing scalable and resilient infrastructures that enable teams to deploy applications faster and with greater confidence. 🌐 Beyond the tech realm, I'm an advocate for DevOps culture, emphasizing collaboration, communication, and a relentless pursuit of improvement. I'm always eager to connect with fellow professionals, exchange insights, and explore opportunities to collaborate on exciting projects. 📚 When I'm not tinkering with the latest DevOps tools, you can find me indulging in books on technology trends, hiking to rejuvenate, and occasionally experimenting with new coding challenges. 🌟 Let's connect! Whether you're looking to discuss DevOps methodologies, explore partnership opportunities, or simply share experiences, feel free to reach out. I'm excited to be part of the DevOps journey, driving excellence together.
Completion Steps →
fetch a code from GitHub by git clone https://github.com/NotHarshhaa/AWS-DevOps_Real-Time_Deployment.git
Setup code commit repository on AWS
push code to code commit using AWS CLI
setup aws code-build for building code
setup S3 bucket for code storage
setup code deployment for the deployment of code stored in AWS S3
setup an EC2 in which you deployed your application
Setting Up AWS CodeDeploy Agent on Ubuntu EC2
create the deployment group and deploy the application
Setup code pipeline to automate the whole process
Step 1 →
above command pulls your application code to your local that is needed to be pushed in the aws code commit
step 2 →Setup code commit
- go to the AWS console search aws code commit and create a demo repository
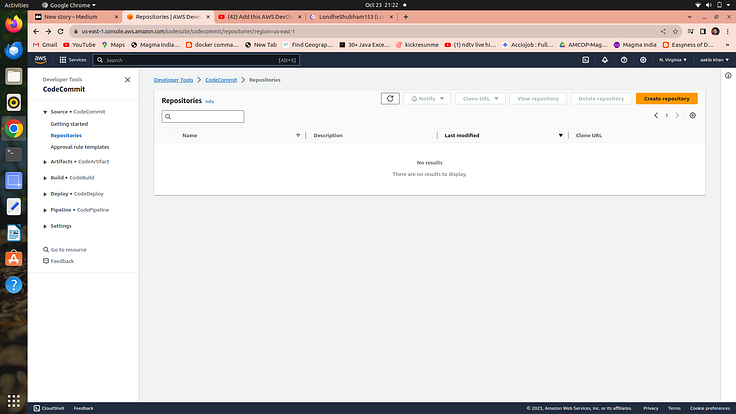
2. provide necessary permission to aws code commit to use it with aws cli which needs to create an IAM user having the permission of aws code commit
3. search IAM and click on Create user
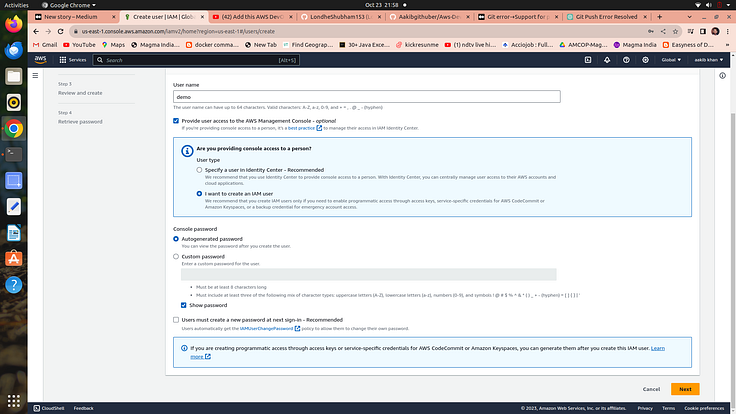
4. click next and create a user
5. now you have to permit your user to code commit
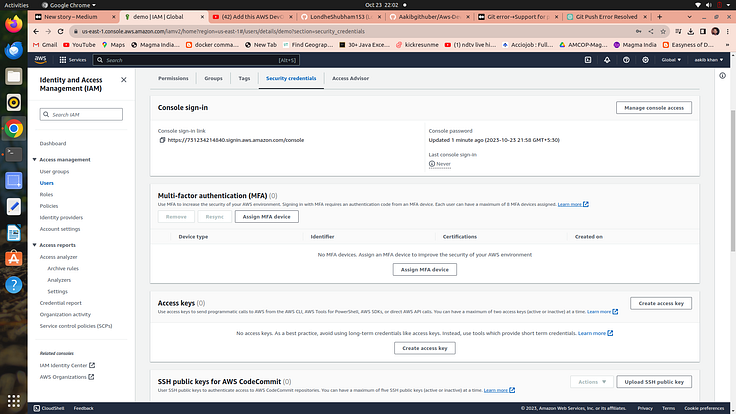
6 . click on user →security credentials →scroll down for HTTPS Git credentials for AWS CodeCommit →click on generate credentials and download csv.credentials file
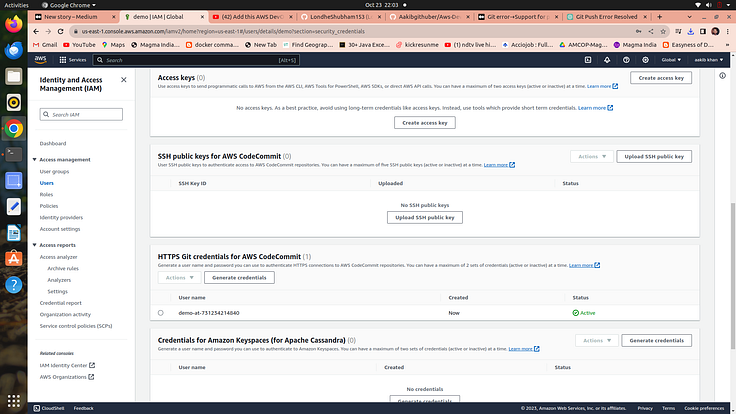
7. you also need to attach a policy called “AWSCodeCommitPowerUser”
go to permissions and then click on attach policies directly search for the above policy and click on add
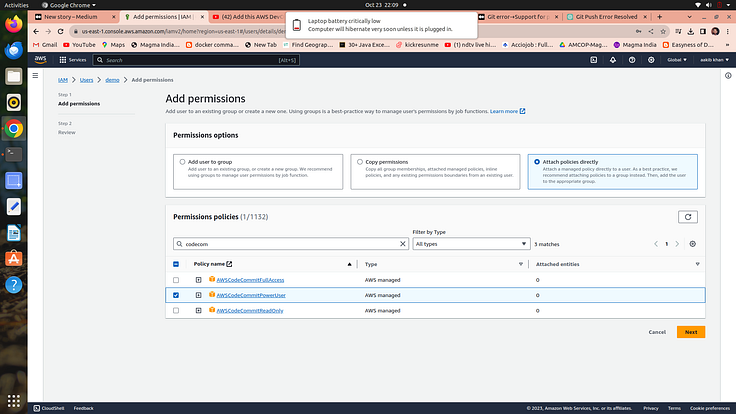
your code commit repository is set next move to step
Step 3 → push code to code commit using AWS CLI
clone your code commit URL go to your terminal and run git clone <copied url>
it will ask you for a username and password → give it to your code commit credentials that you generated

3. now you have to push all the cloned code of the project repository to your code commit repository by commands
cd demo
git clone https://github.com/NotHarshhaa/AWS-DevOps_Real-Time_Deployment.git
git add.
git commit -m ”new commit”
git push
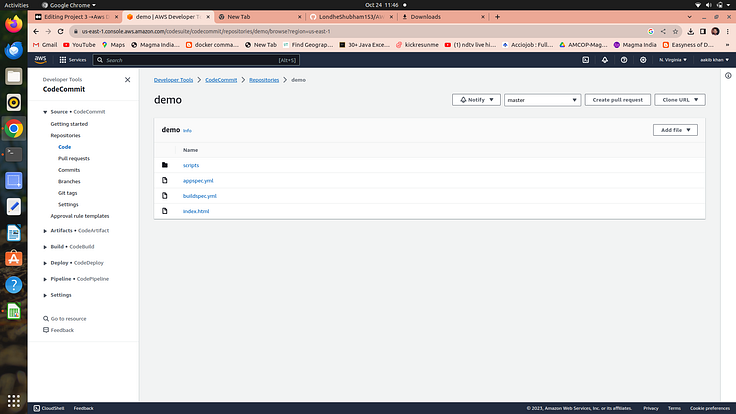
pushed code in a code commit
Step 3 → Setup aws code-build for building code
go to the AWS console and search for AWS code build
click on the Create Project option
give a name to your project “demo project”
on the repo option click on demo and branch to master
for OS choose Ubuntu,runtime to standard and image to the latest version
build spec file → It is a file that tells the code build what steps are needed when you building the code we have a build spec file in the code commit so the “click on use a build spec file” option
click on create build project option and keep everything as it is
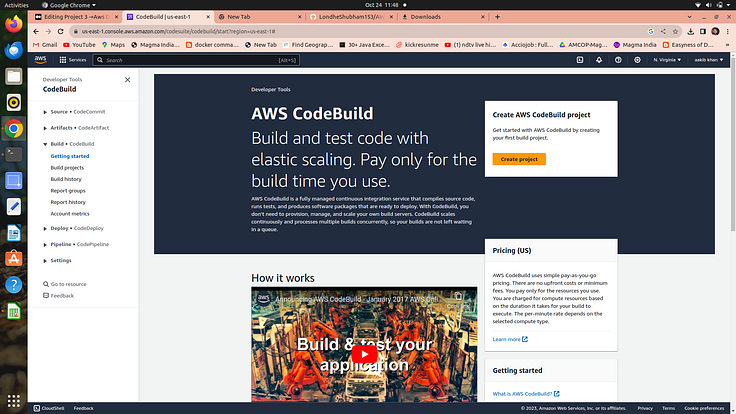
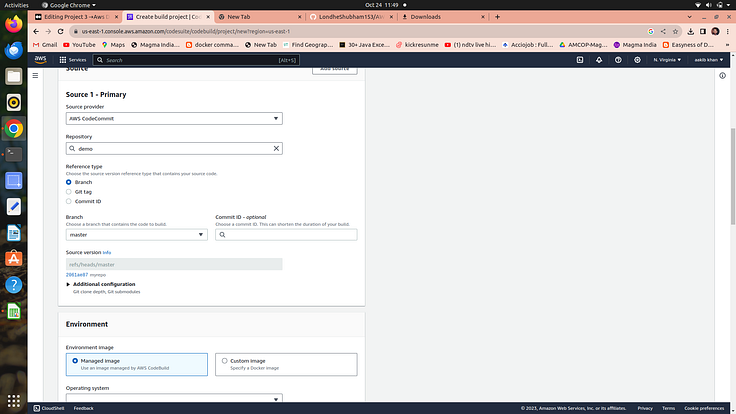
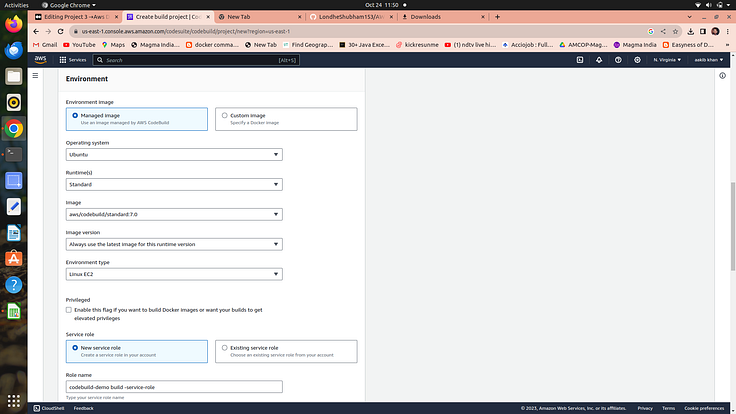
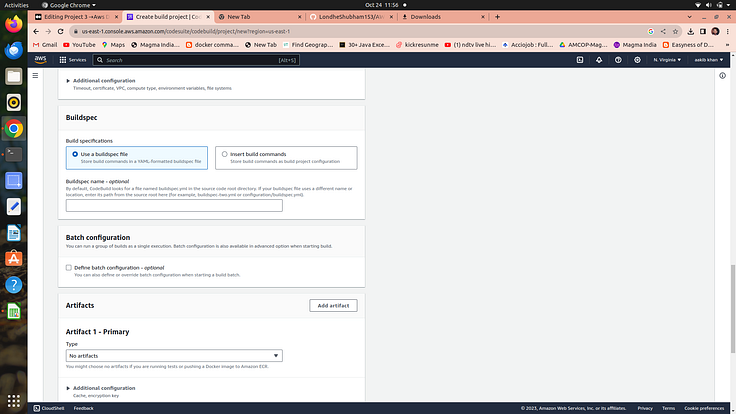
8. Now click on start build option
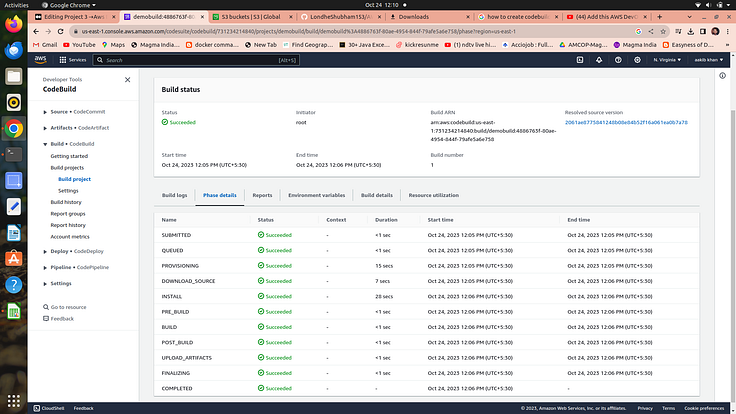
now you need to store this code in s3 which is further used by code deployment for deployment
step 5 →setup S3 bucket for code storage
go to the console and search for s3 and create a bucket
bucket name should be unique globally

3. go to code build and click on edit → artefact →change no artefact to s3 and choose a bucket created in above step
4. and choose a zip file for storage
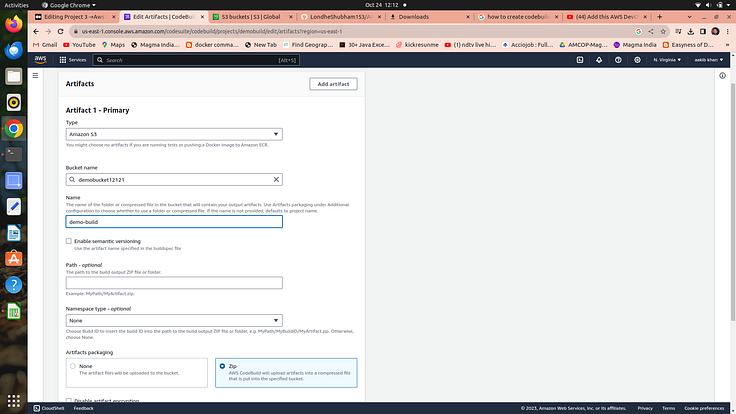
5. click on update artefacts and build again the same project with this extra step of artifacts
6. after building you will see that your code is stored in an s3 bucket
now we have to move to step no.6
Step 6 →setup code deployment for deployment of code stored in aws S3 to an EC2
- go to console and search for aws code deploy and click on create application option
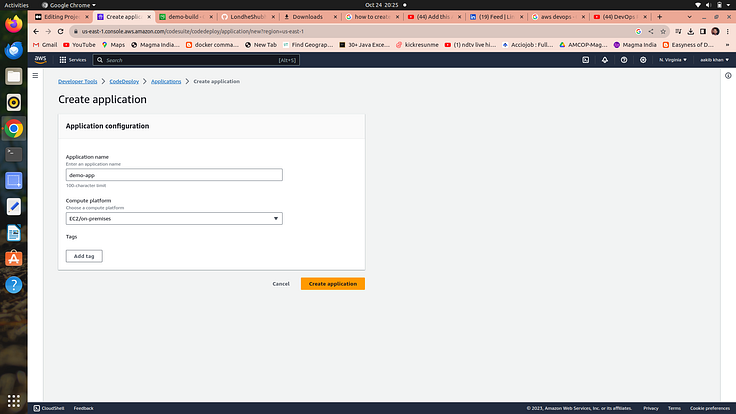
select ec2 in the dropdown menu
Step 7 → setup an EC2 in which the application will run or be deployed by code deploy
- go to ec2 and launch the Ubuntu machine
create an aws ec2-service role
having the following permission which helps ec2 to communicate with code deploy
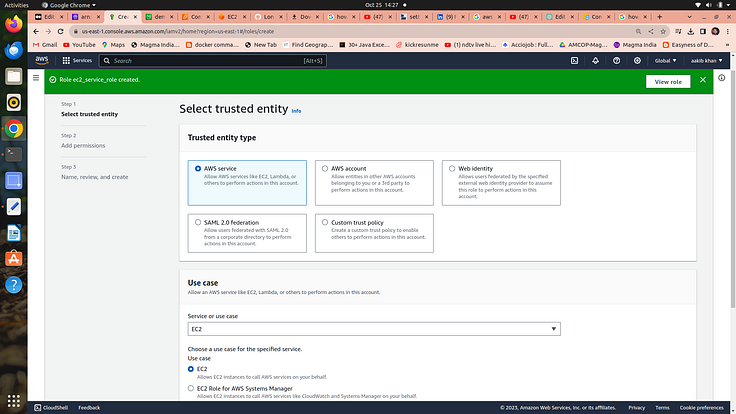
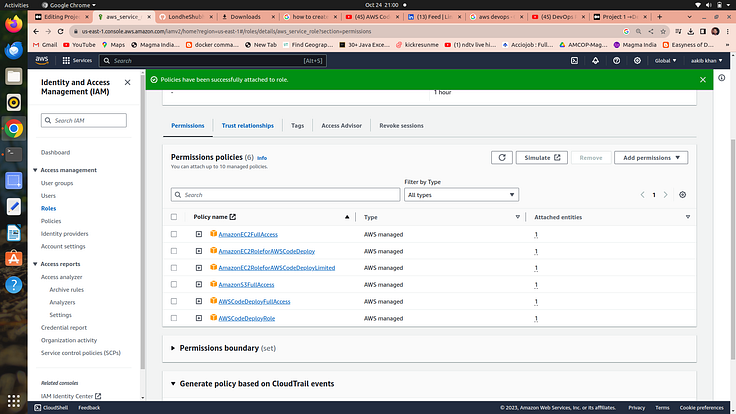
2. attach that role to your ec2 →actions →security →modify iam role
create an aws code_deploy_service_role
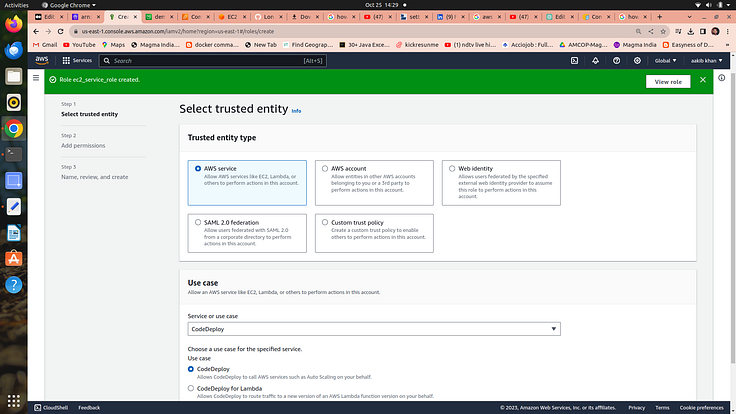
this role needs to be attached on code deployment to allow it to make contact with ec2 and s3
Step 8 →Setting Up AWS CodeDeploy Agent on Ubuntu EC2
To deploy your app to EC2, CodeDeploy needs an agent that deploys the code on your EC2.
So let’s set it up.
Create a shell script with the below contents and run it
connect to your ec2 and run the following commands
sudo su
apt update
vim agent.sh
copy and paste the following code to your file
#!/bin/bash
# This installs the CodeDeploy agent and its prerequisites on Ubuntu 22.04.
sudo apt-get update
sudo apt-get install ruby-full ruby-webrick wget -y
cd /tmp
wget https://aws-codedeploy-us-east-1.s3.us-east-1.amazonaws.com/releases/codedeploy-agent_1.3.2-1902_all.deb
mkdir codedeploy-agent_1.3.2-1902_ubuntu22
dpkg-deb -R codedeploy-agent_1.3.2-1902_all.deb codedeploy-agent_1.3.2-1902_ubuntu22
sed 's/Depends:.*/Depends:ruby3.0/' -i ./codedeploy-agent_1.3.2-1902_ubuntu22/DEBIAN/control
dpkg-deb -b codedeploy-agent_1.3.2-1902_ubuntu22/
sudo dpkg -i codedeploy-agent_1.3.2-1902_ubuntu22.deb
systemctl list-units --type=service | grep codedeploy
sudo service codedeploy-agent status
5. press →esc + : +wq →for exit
6. to run this file use the command →bash agent.sh
you have the following output
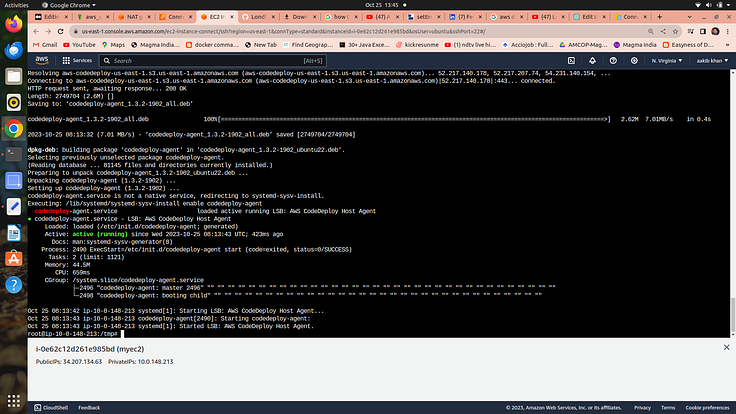
your code deploy agent is running
let’s move to the next step
Step 9 →create the deployment group and deploy the application
- go to your code deploy and create a deployment group
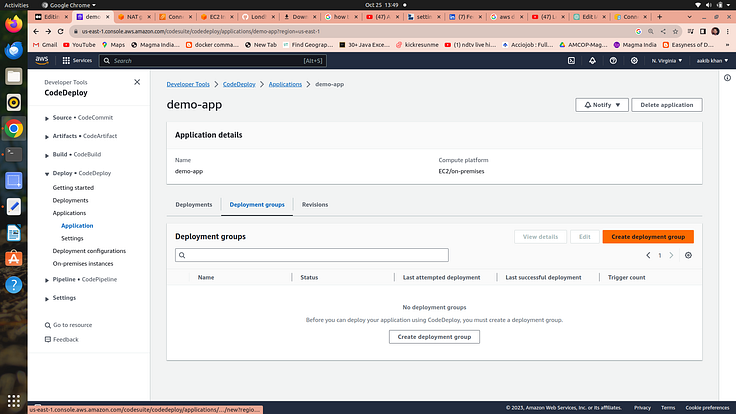
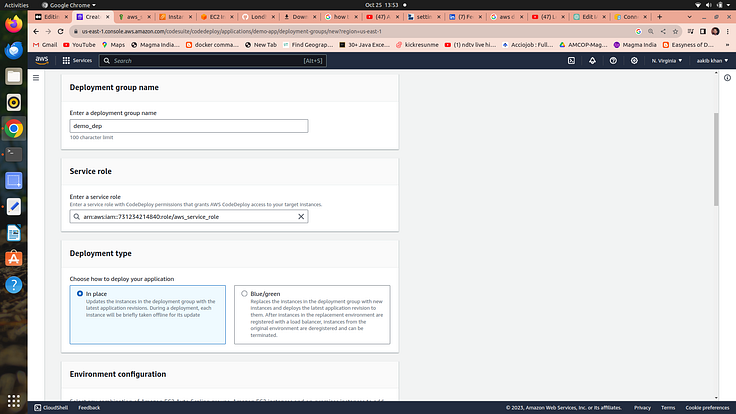
copy the srn of aws code_deploy_service_role or created above
2. choose in place in deployment type
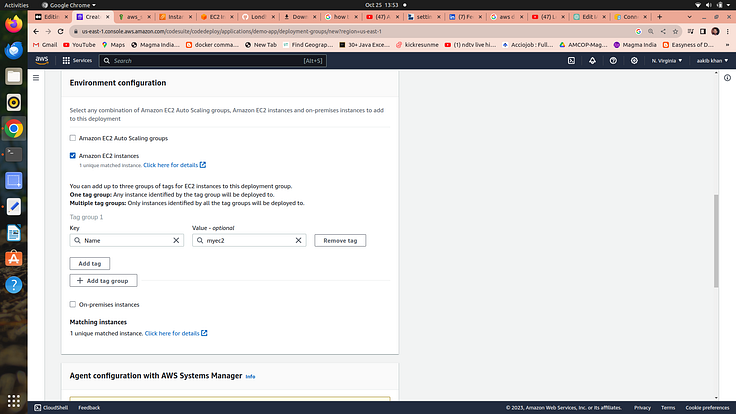
3. select ec2 instances →name →choose your ec2 in which code deploy agent is running
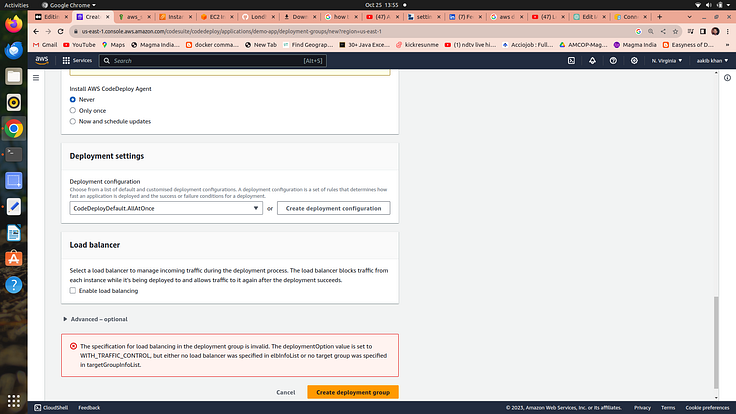
4. untick on enable load balancing option and never on install aws code deploy agent
and click on the Create Deployment option you will see the following page
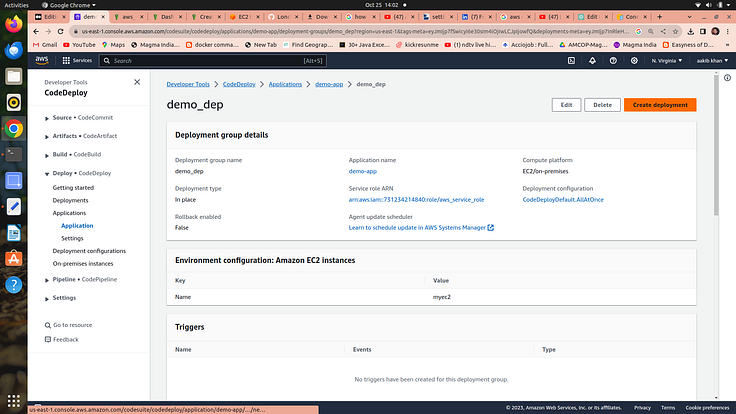
click on the Create Deployment option following page appears
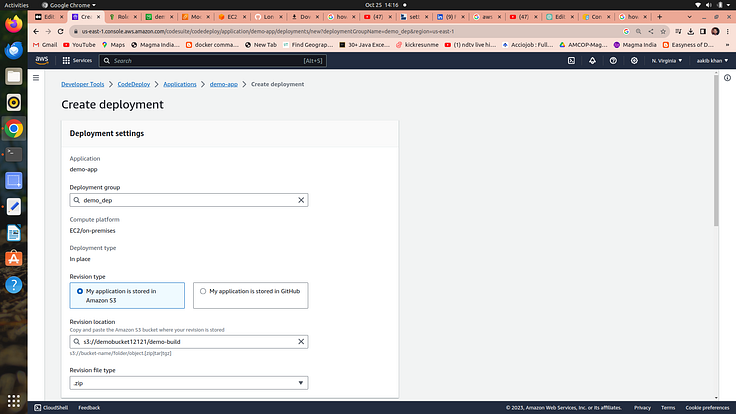
5. select the above options and paste the path of your build code that is stored in s3 just go to s3 choose a folder and copy the s3 URL
and then click on Create Deployment after a few seconds
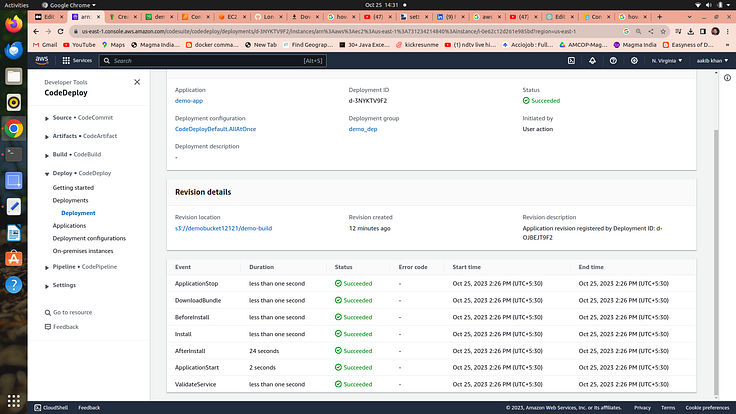
your application is successfully deployed
now go to your ec2 and click on your public IP you will see your application is running
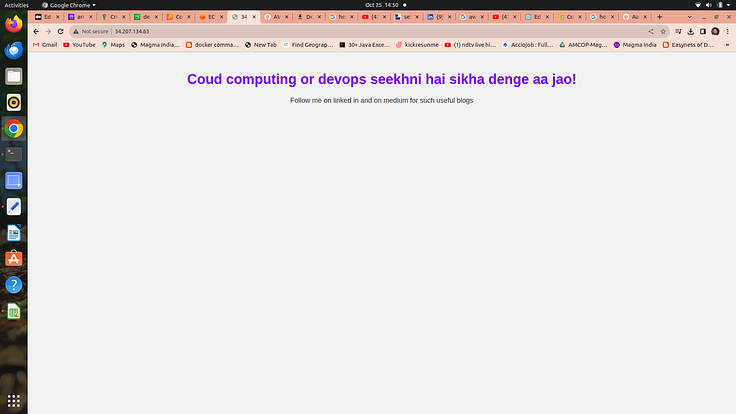
congrats you are a DevOps and cloud engineer both at the same time
Step 10 → Setup code pipeline to automate the whole process
- go to your code pipeline and create a pipeline
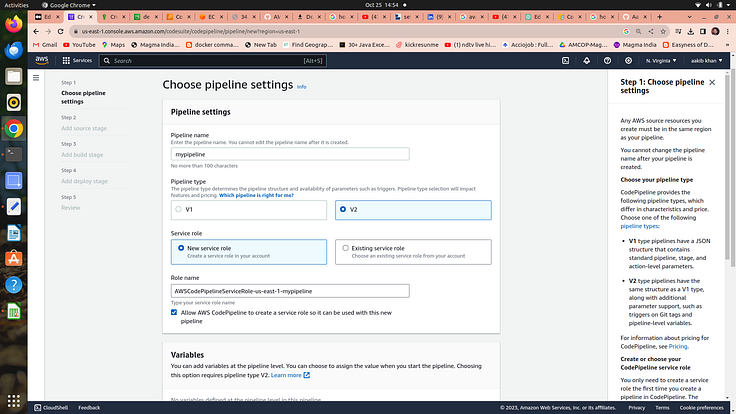
2. select pipeline type = V2
click on new service role →next step
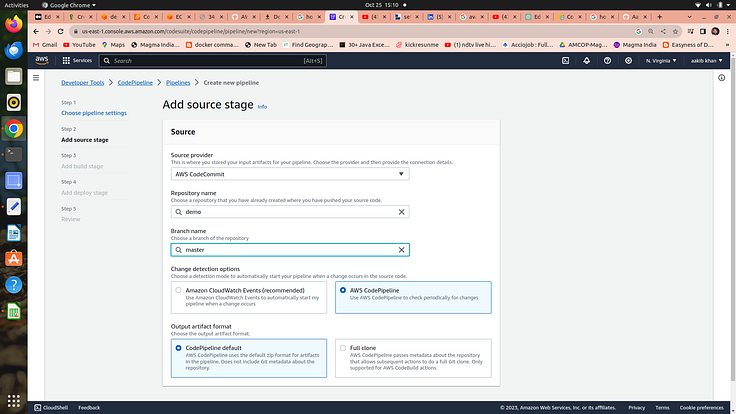
3. choose source = code commit
repo=demo
branch=master
choose aws code pipeline(this options immediatley triggerd pipeline whenever there is a new commit in a repo)
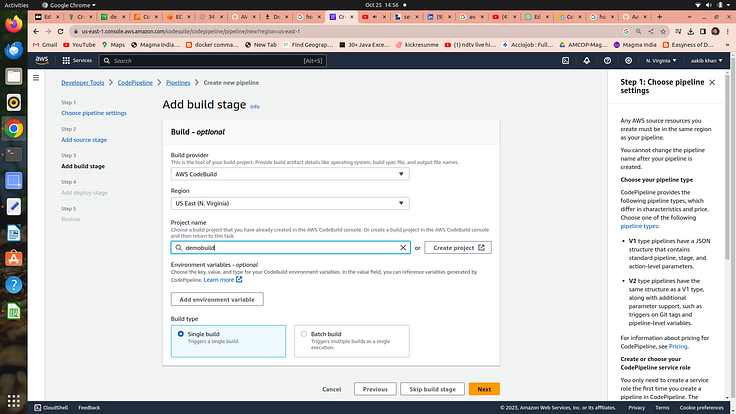
4. choose aws code build
project name =demobuild →single build →next step
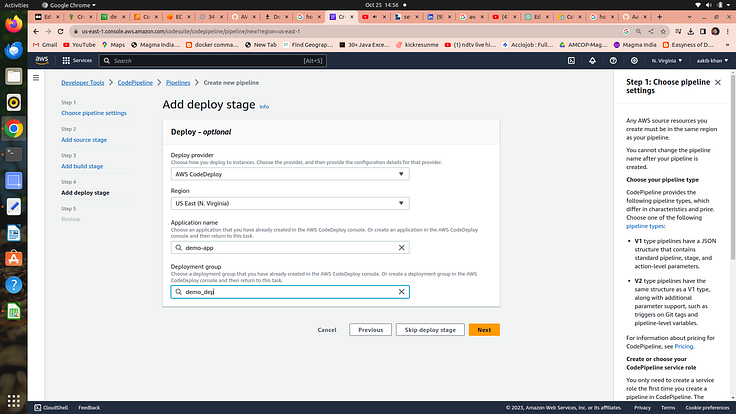
5. choose aws code deploy
aplication name = demo app
deployment group=demo_dep
next
6. review and pipeline and start it
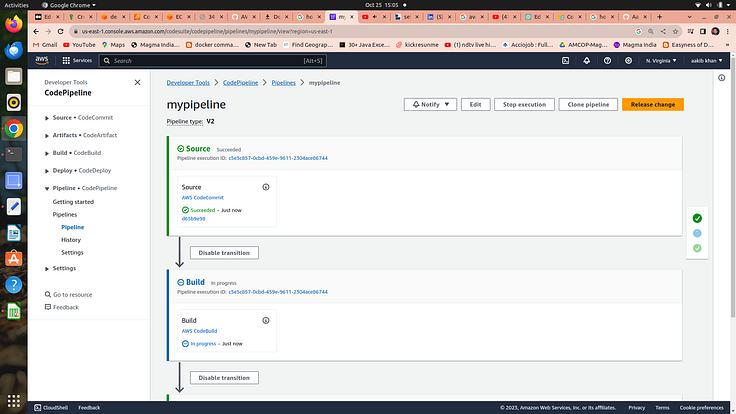
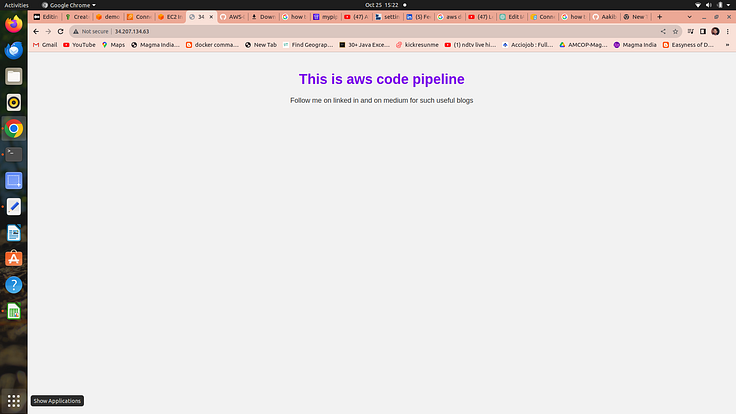
7. for checking if it triggers or not whenever i commit make some changes in file and now the result is the following image
If you find this article helpful then you can buy me a coffee.
Follow for more stories like this 😊/ GitHub.